From the most simplistic perspectives, forex expert advisors are strategies like any other. Traders can develop strategies using indicators or by leveraging stop loss and trailing stop limit orders. Forex expert advisors use these same strategies only that they execute trades without substantial human input.
A trading robot can watch the market for every single second of a 24-hour trading day. Nonetheless, do these expert advisors deliver the results that their creators usually claim? Well, the only way to know the answer to that question is through backtesting. Backtesting entails utilizing historical data to test the probability of the trading robot can meet the demands of the trader.
Indeed, expert advisors are an integral part of forex trading activities. Admittedly, many traders have gained fortunes from these trading robots, self-made or bought from vendors. But even so, many vendors of these tools are not genuine. It will not be surprising that you buy a trading robot, and you find out that it cannot achieve closer to what the vendor promised. That is why testing of an expert advisor is of urgency.
Why is it essential to test an expert advisor?
We spend a lot of time looking for money. Unfortunately, we will never get back the hours spent working. However, we can justify the hard work by putting the money to good use. As such, you need to ascertain that the expert advisor that you are buying is legitimate and that the strategy it uses is accurate. Therefore, it is essential to test the EA to ensure that your money does not go down the drain.
Secondly, testing and EA enables the trader to see the dark side of the tool. Usually, vendors do not mention the demerits of the trading robot because of the dent it makes on the shiny armor they want you to see. Even if you made the robot yourself, you could not see the dark side unless you do something as objective as testing. As such, testing may point you to some issues that might need solving before you deploy the robot.
Critical as testing of expert advisors is, many traders do not know how to do it. Few traders understand that testing could save them money and frustration. Fortunately, this article offers a systematic guide for testing a trading robot.
First, you need to install the trading robot
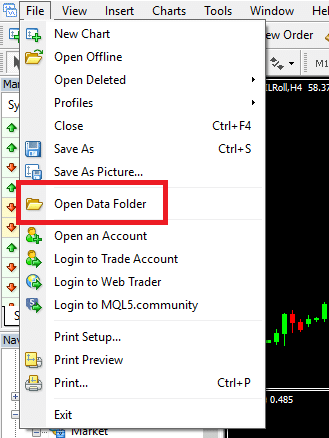
For this illustration, we will use a free version of “Hit And Run FF” trading robot. Note that the EA must be coded in MQL4 (MetaQuotes Language version 4) to be compatible with the MT4 platform. Once you download the EA, it will appear in the “Experts” folder of the MT4. To access the folder, first, open the “Open Data Folder” that appears in the drop-down after clicking the File button on the navigation bar of the MT4 platform.
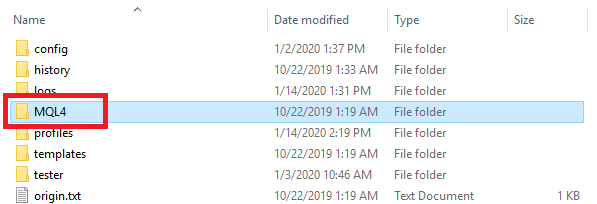
Once the folder is open, follow the and then open the “Experts”folder.
After the Experts folder is open, you will find the setup file of the downloaded EA in there. Usually, this file’s extension is in the format “.ex4.”

Run the setup file and close the window. Next, exit the MT4 platform. Once you reopen the MT4, you will realize that the new EA appears under the “Expert Advisors” tab. Just click the plus (+) sign, and the folder will unfold.
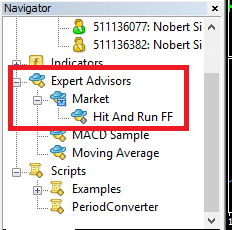
However, the installation process is not complete when the EA appears on the MT4. The next step is to drag the EA and drop it on the chart of the market you would like to trade. In this illustration, we are trading the EUR-USD pair. After losing the EA on the chart, a window will open where you will adjust the parameters according to your liking.
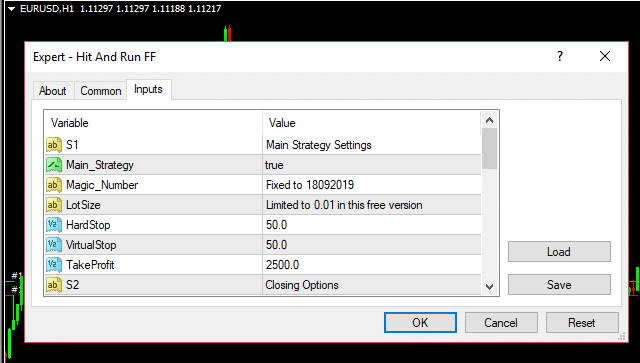
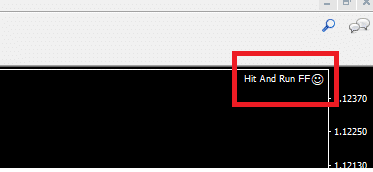
Click OK. To ascertain that the EA is working, check the top right corner of the MT4 platform for a smiling emoji next to the name of the trading robot. If the emoji is not smiling, it means the EA is not working, and hence you need to adjust the parameters of the EA.
In our case, the EA is working well.
Testing the trading robot
For beginners, testing the EA is challenging, but things get better once you learn the ropes. The EA is installed, and it is running well, the next step is to start the testing procedure.
Step 1: Set Minimum and Maximum bars
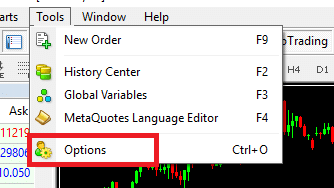
When testing an EA, it is essential to specify the maximum and the minimum bars with which you would conduct the test. Go to the “Tools” tab and then click on Options.
Clicking the tab will open another window where you can make the specifications. Usually, the default Max. Bars are 512,000, and the Min. are 65,000.
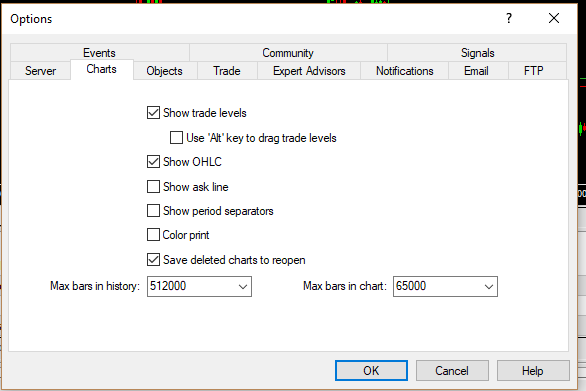
Click OK and move to the next step.
Step 2: Choose the pair you want to use test
Usually, every EA is built for certain currency pairs. In our case, we want to test the Hit And Run FF on the EURUSD pair. Again, go to the Tools tab and this time open “History Center.”
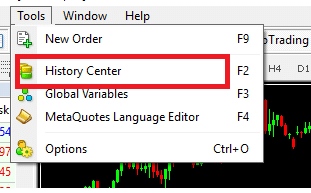
Clicking on the tab will open a window where you will choose the right currency pair and the ideal timeframe for the test.
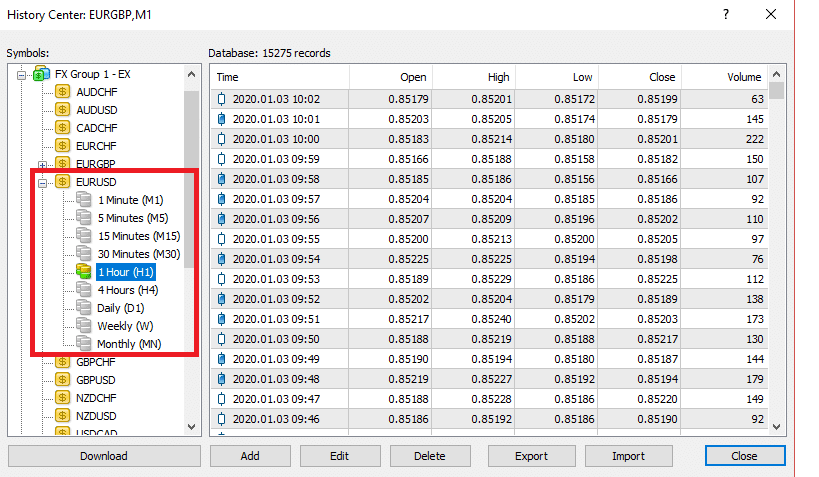
In our case, the timeframe of choice is one hour. After that, click the download button at the bottom-left section of the window. After a while, the download will complete and then click “Close.”
Step 3: Open the Strategy Tester
Click the ‘View’ tab on the navigation bar. On the drop-down, find a tab titled “Strategy Tester.”
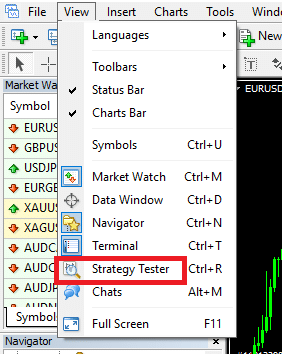
Step 4: Run the test
A new panel will open at the bottom of the chart.

On the box after the one titled “Expert Advisor,” there is a drop-down that lists the EAs that are installed. Select the one you are testing. Next, please select the preferred currency pair, which in our case, is EURUSD. Under the Model, select “Every Tick” because this is ideal for testing purposes. Then, click the use data and specify the period over which you would like to backtest. The perfect period is one month. Once everything is set, click “Start” and let the platform run. At the end of the testing process, there will be a short clicking sound to signify that the testing process is complete.
At the bottom, there are several tabs labeled ‘Settings,’ ‘Results,’ ‘Graph’ etc. To see the performance of the EA, click on results. However, the results are also represented graphically. Looking at our graph, using the EA in the month over which we tested would have resulted in a net loss.
