Technical indicators are essential tools in forex, stocks, and commodity trading. While it is possible to trade without these indicators, most investors find them extremely useful. This article will look at the concept of custom indicators in MT5. Specifically, we will look at what they are, why they are built, how to create them, and some tips for installing them.
What is a technical indicator?
A technical indicator is a tool that traders use to predict the future direction of a financial asset. These indicators are created using mathematical calculations. For example, the Simple Moving Average (SMA) is made by adding a currency pair’s closing or opening prices and then dividing by the number of periods.
Assuming that the EURUSD pair is trading at 1.1200 and the 14-day Moving Average is at 1.100, it can be said that the pair is “overvalued.” The same concept was used widely during Covid-19 reporting.
There are several types of technical indicators. There are trend ones that seek to highlight the overall trend of a currency pair or any other asset. They include Moving Averages, Envelopes, and Bollinger Bands.
Also, volume indicators attempt to explain the aspect of volume in the market. Examples of these are the Accumulation and Distribution, Money Flow Index, and the On Balance Volume.
There are also breadth indicators, which are mostly used in stocks trading. They measure the number or volume of advancing stocks and help to predict the future direction of indices. Examples of breadth indicators are the McClellan Summation and the Advance-Decline Line (ADL).
Another type of indicator is an oscillator. These are indicators like the Relative Strength Index (RSI) and the Commodity Channel Index (CCI) that are mostly used to identify overbought and oversold levels.
What is a custom indicator?
A custom indicator in trading is one that you have built yourself or one that you have acquired and implemented.
The idea behind custom indicators is simple. If you find that the existing indicators are not working, you can come up with an indicator and then implement it.
A good example of this is when you are using Moving Averages. Assume that your strategy involves using a Moving Average ribbon made up of different periods like 10, 20, and 40. You can easily apply these Moving Averages using the MT5 or MT4. But if you want to save time, you can create a custom indicator made up of these periods.
Custom indicators are mostly popular among experienced traders because of the difficulty involved in designing and building the indicators.
How to build custom indicators in MT5
Like with expert advisors or robots, building custom indicators is not an easy thing since it requires expertise in two separate fields. First, a person building a custom indicator needs to have experience in day trading. That’s because they will apply this trading theory.
Second, it is important to have skills in programming languages like Python and MQL5. Therefore, very few people have this experience.
There are several steps involved in building a custom indicator in MT5. Let us look at some of these steps.
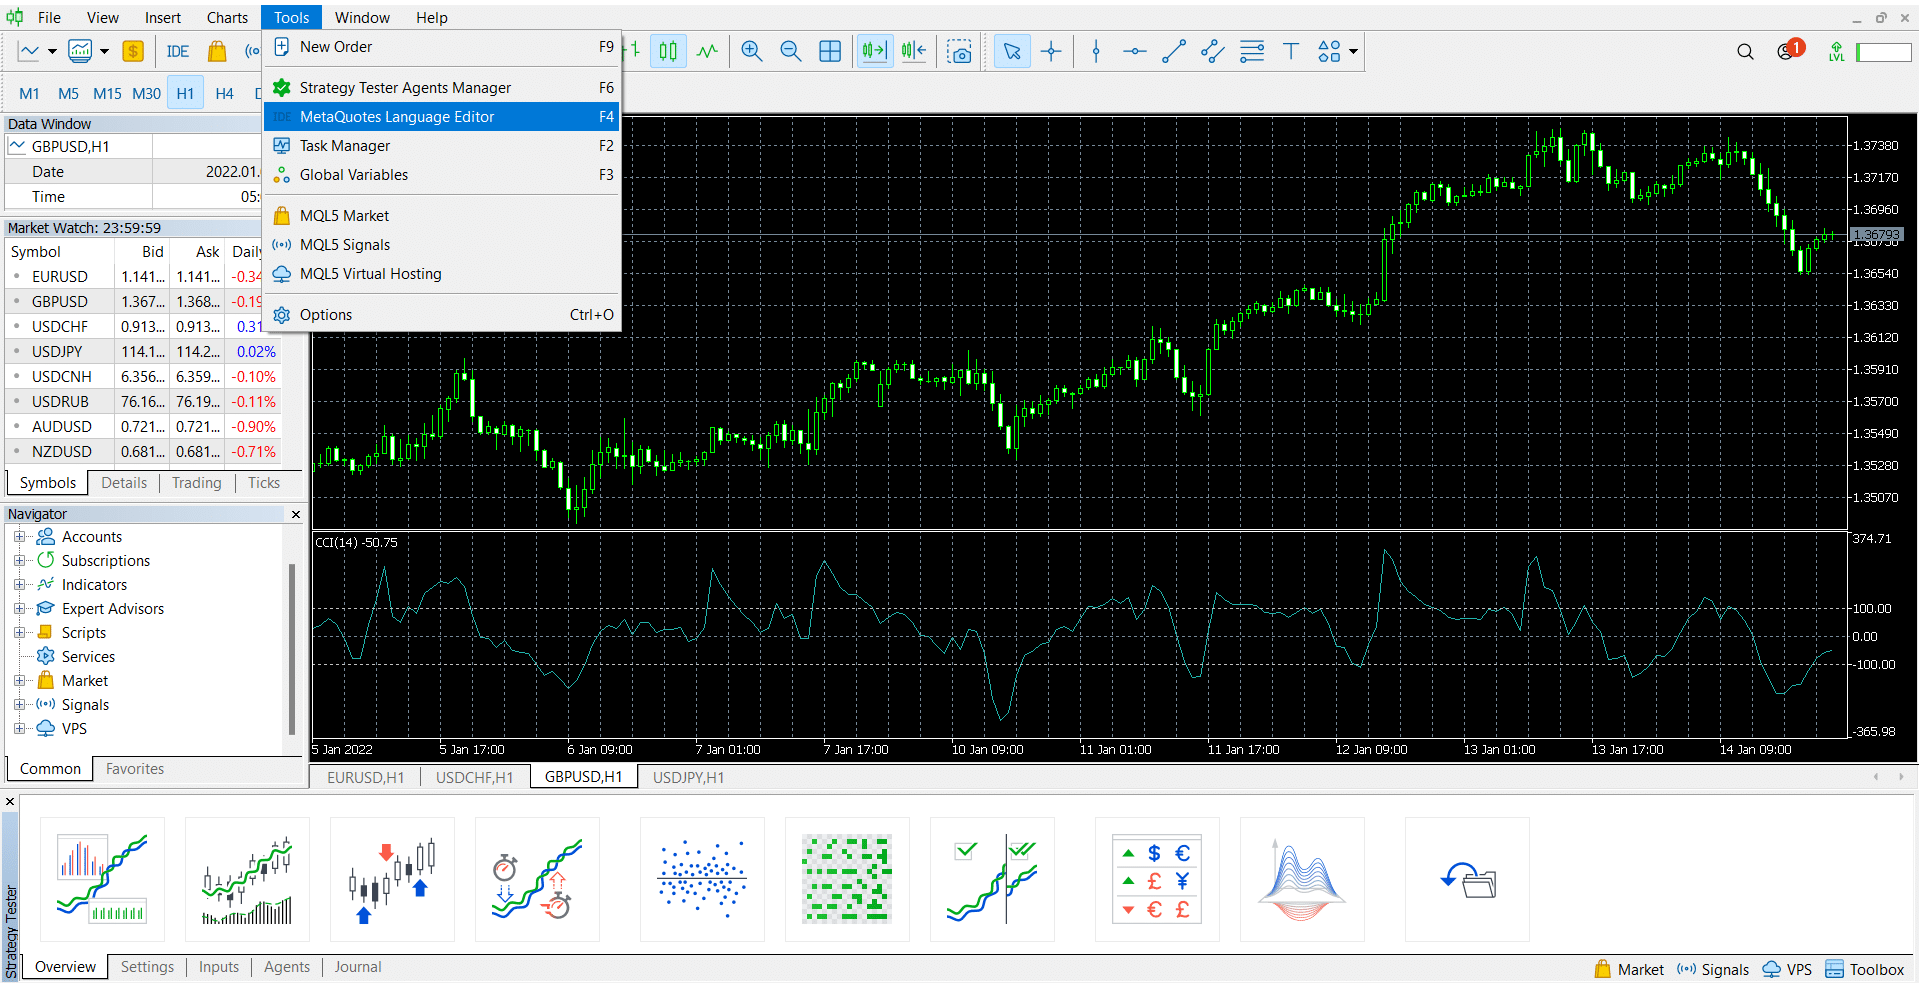
First, with your MT5 indicator opened, go to tools and then the MetaQuotes Language Editor tool. This is a tab that includes a platform where you can build robots, indicators, and scripts. The figure below shows how to approach this.
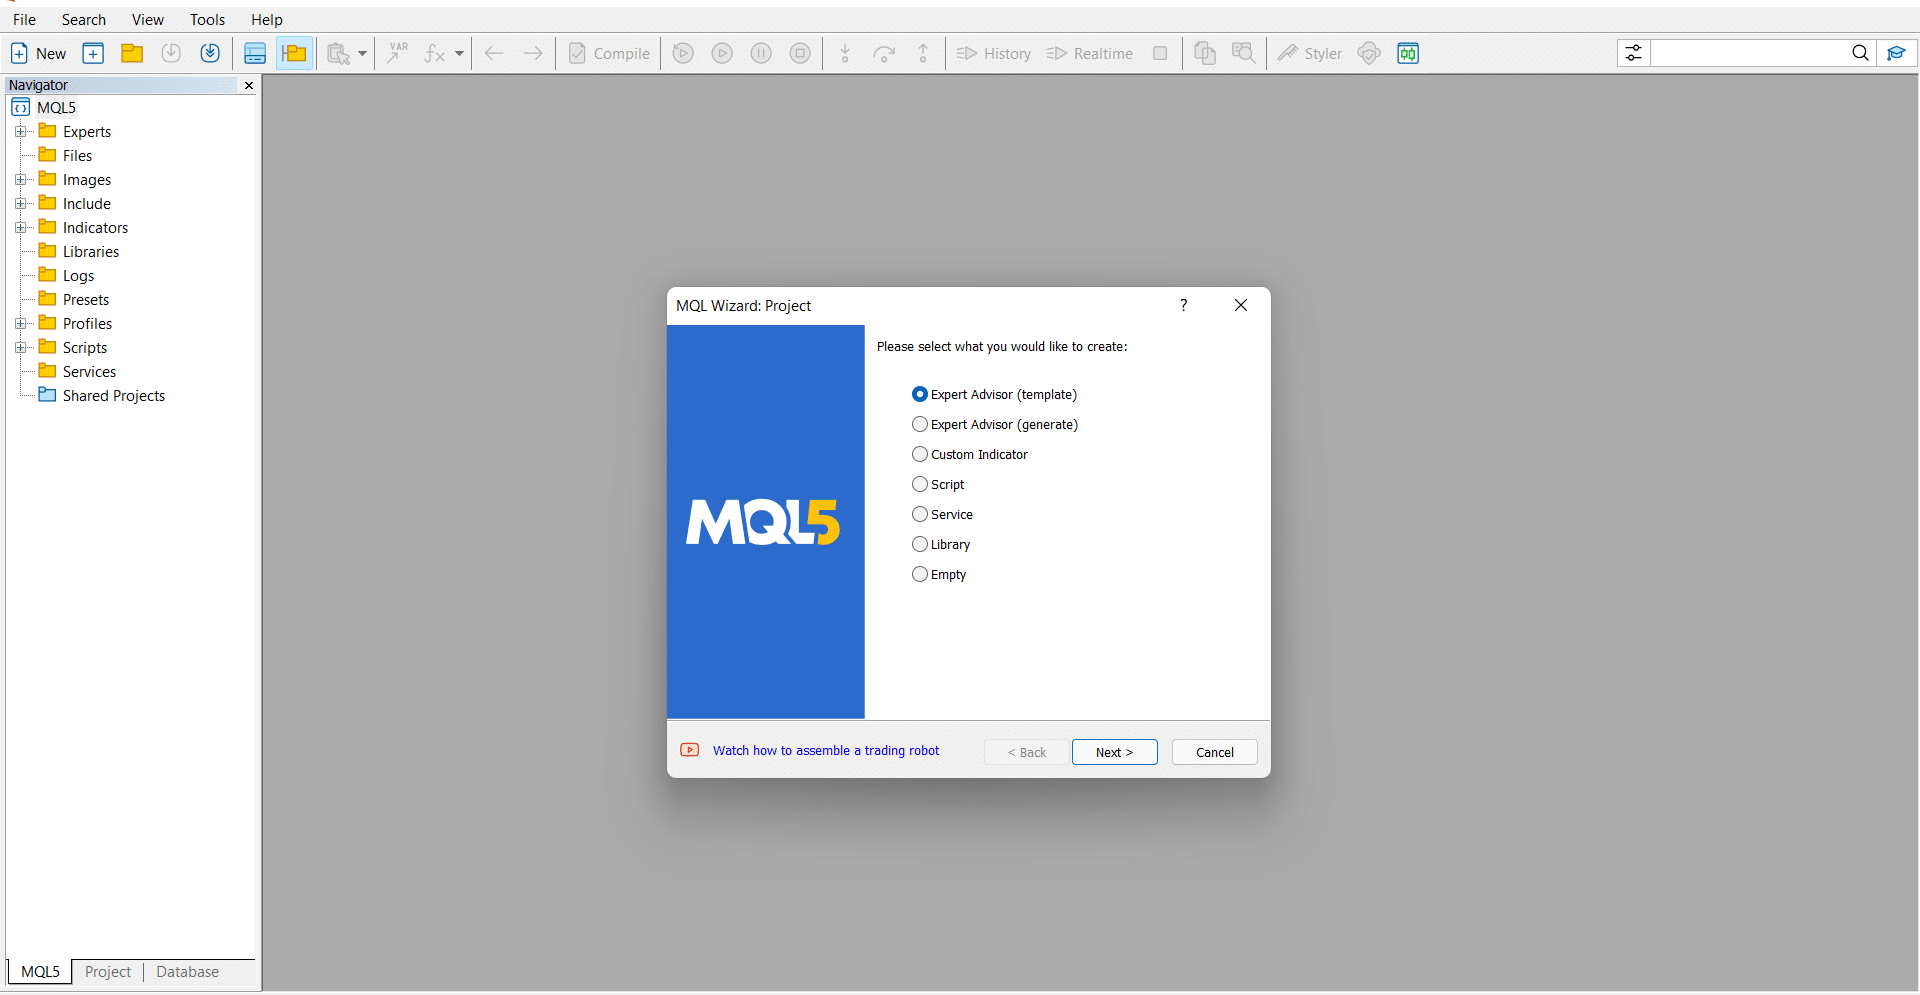
Opening that link will lead to the following page. It is a page that simply allows you to select what you want to build. In this case, you should select the customer indicator option.
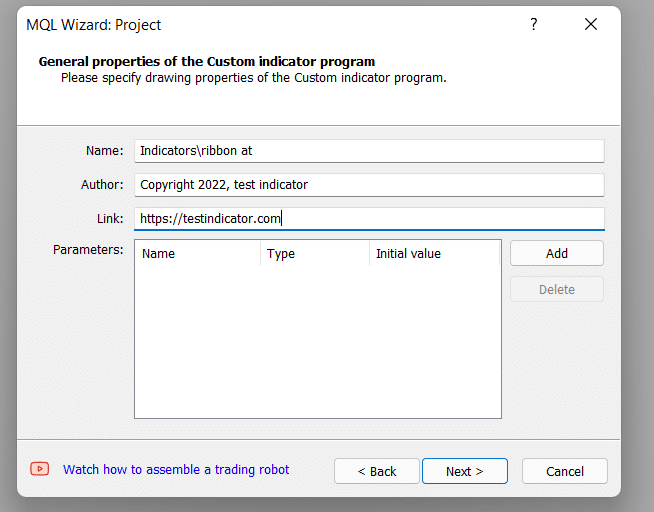
In the next stage, you should enter the name of the custom indicator you are building. You can also enter optional details like the author’s name and your website. You should enter these details, as shown below. In this case, the name of the indicator is known as a “ribbon at.”
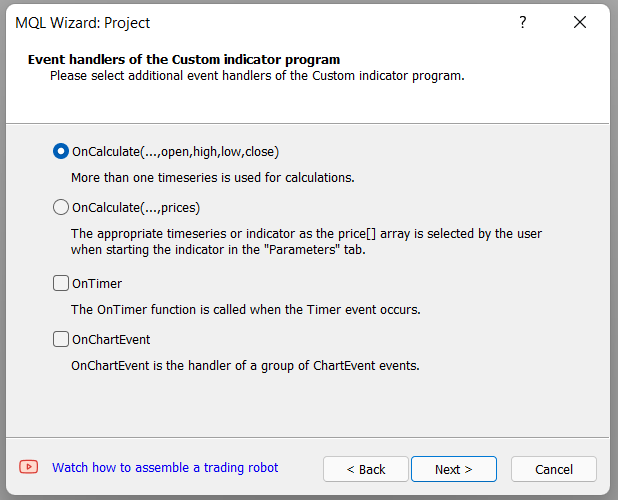
In the next stage, you will have four key options: OnCalculate (…, open, high, low, close), OnCalculate (…, prices), OnTimer, and OnChartEvent. In the first option, there will be more than one-time series used in the calculations.
In the second option, the appropriate time series or the indicator is selected by the user. The OnTimer option is activated when the Timer event happens, while the OnChartEvent is the handler of a group of events. You should select one option.
Finally, the next setting option is to select where the indicator will be. You can leave the option open if you want it to happen in the main chart. Alternatively, you plot the indicator in a separate window.
After this, you will be taken to a separate page, where you will write the code. As shown below, some of the options we entered in the previous section appear in this part. They include the name of the indicator, copyright, and the name of the website.
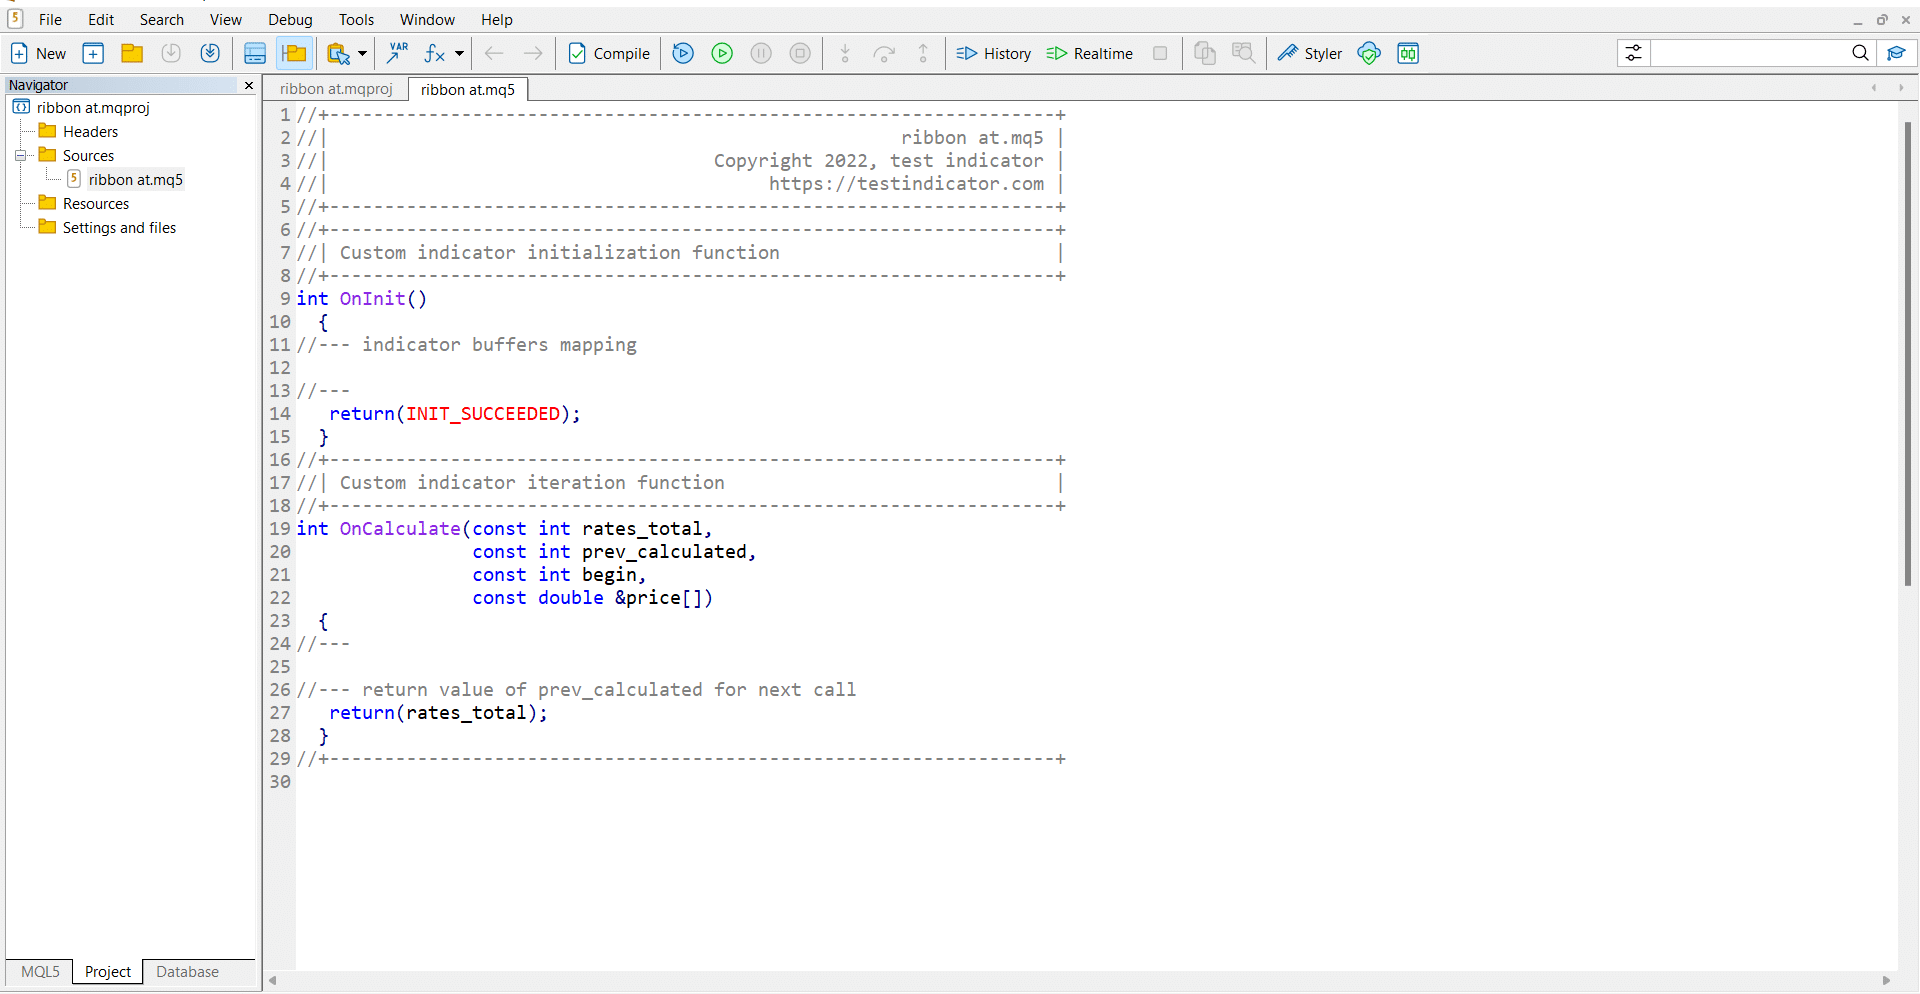
The next section is where the hard part comes in. In it, you will use your concept to write the custom indicator code.
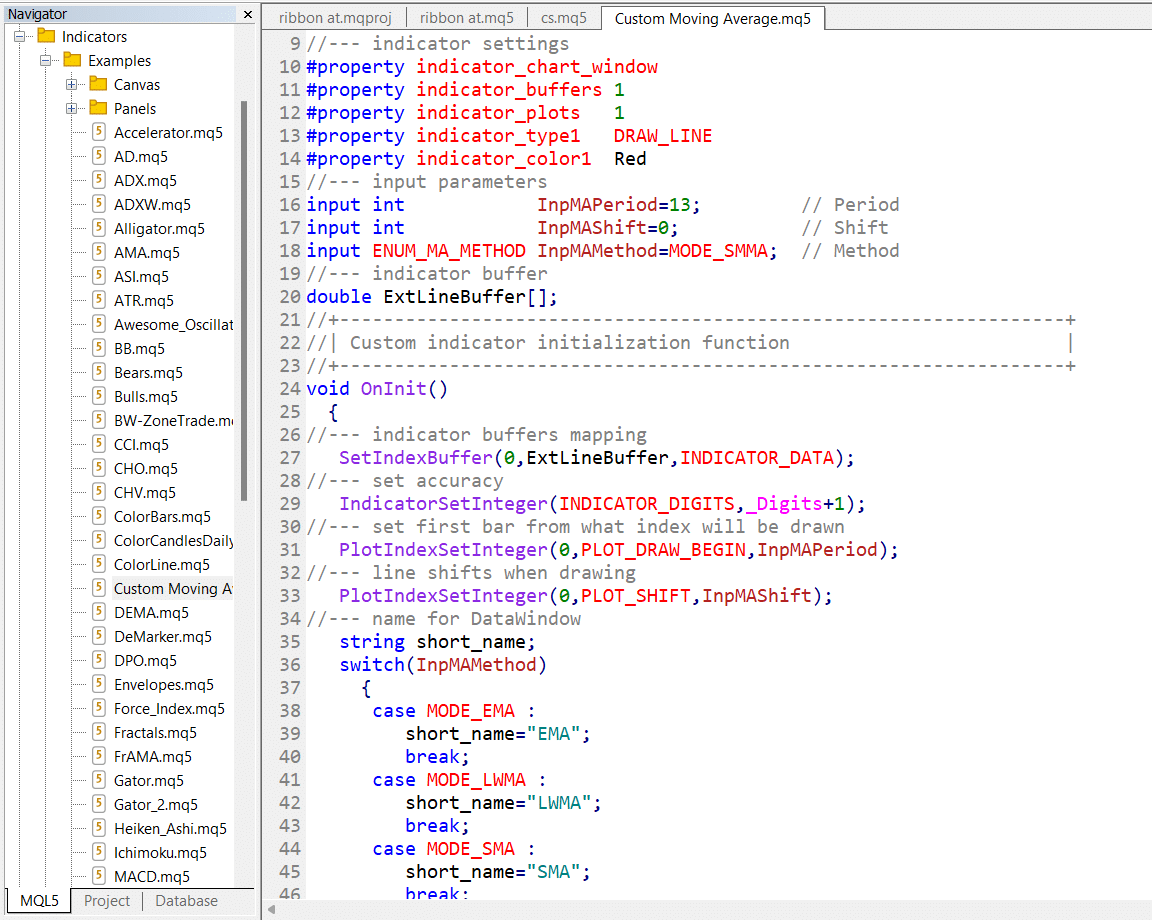
The screenshot above shows what this code looks like.
Compiling and saving the custom indicator
After creating the robot, the next stage is to compile and then save it. To compile the code, you should go to File and then select the compile option. After this, the indicator will show you whether there are errors. If there are no errors, you can go ahead and save the custom indicator as shown below. Save it to a place where you can locate it easily.
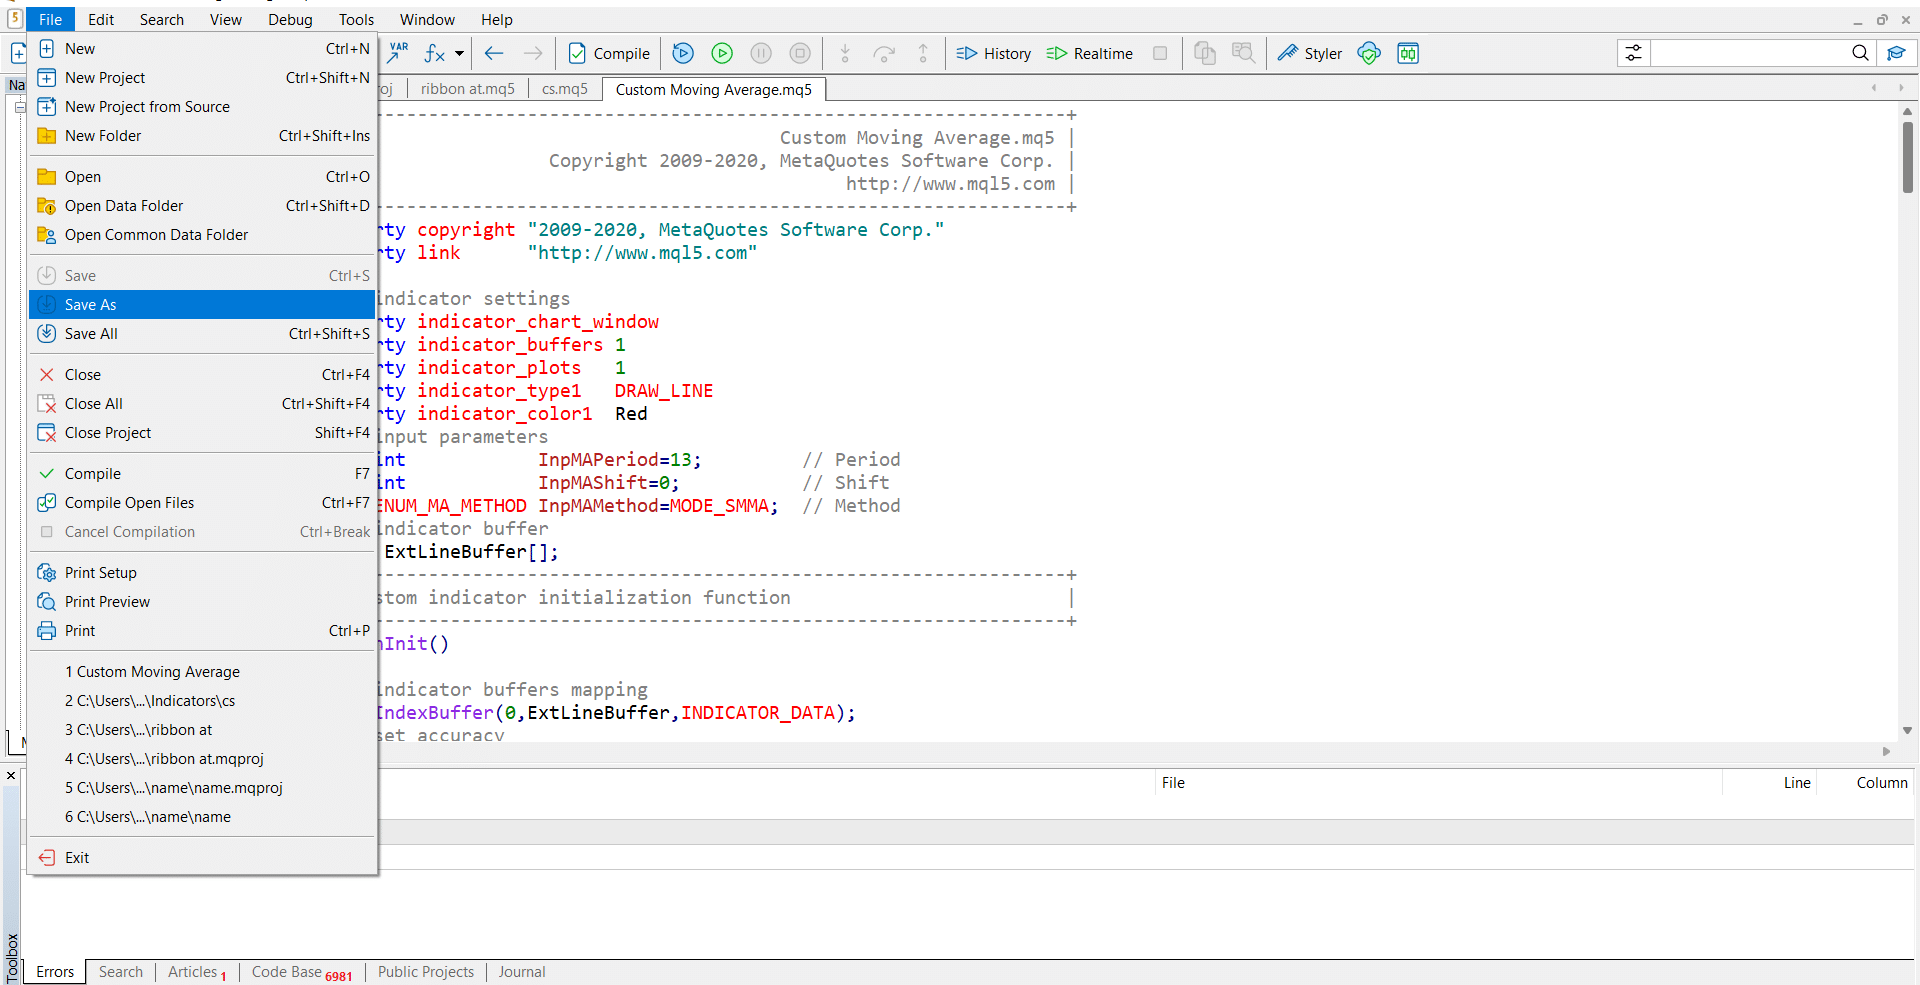
Then, you should install the indicator and test it in a demo account.
Final thoughts
Building a custom indicator is an exciting process, especially if you have experience in trading and software development. Still, it can be a difficult thing for people without this experience. However, if you are interested in such an application, you can order it in the marketplace. Still, for most traders, we believe that the existing indicators are enough.